Chevrolet Niva coolant replacement
Complexity
Pit / Overpass30 minutes - 1 hour
Tools:
- Ratchet wrench
- Extension
- 8 mm head
- 10 mm head
- 13 mm head
- Narrow nose pliers
- Torque wrench
- Funnel
Parts and consumables:
- Coolant 8 l (10 l with a reserve)
- Technical capacity
- Radiator cap O-ring (if necessary)
- Plastic bottle
- Rags
Notes:
According to the Chevrolet Niva maintenance regulations, the coolant should be replaced after two years of operation or after 60 thousand kilometers, whichever comes first. In addition, if the coolant has changed its color to reddish, replace it immediately, as such a change indicates that inhibiting additives have developed and the liquid has become aggressive towards the parts of the cooling system.
Change the coolant only when the engine is cold.
1. Place the car in the ditch and open the hood.

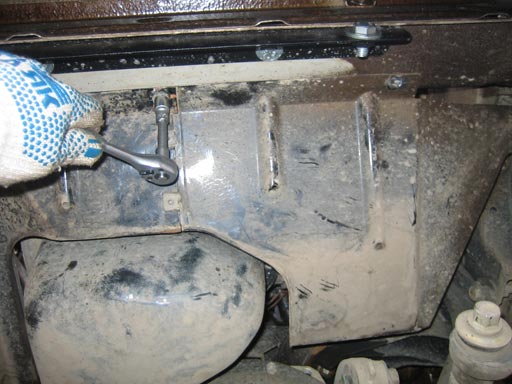
2. Remove the oil sump guard and engine mudguard as described.
Note:
The crankcase guard and mudguard need not be removed, but in this case you will have to use some kind of device to collect the drained fluid, otherwise it will inevitably spill over the area under the car.
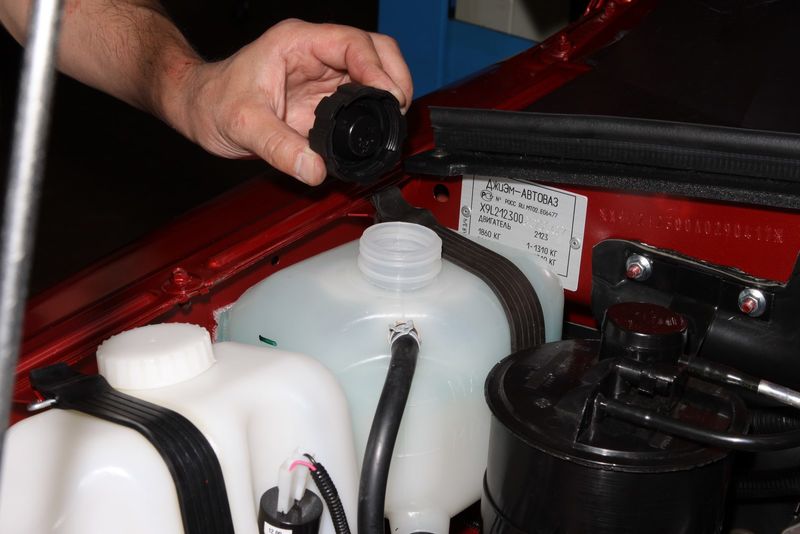
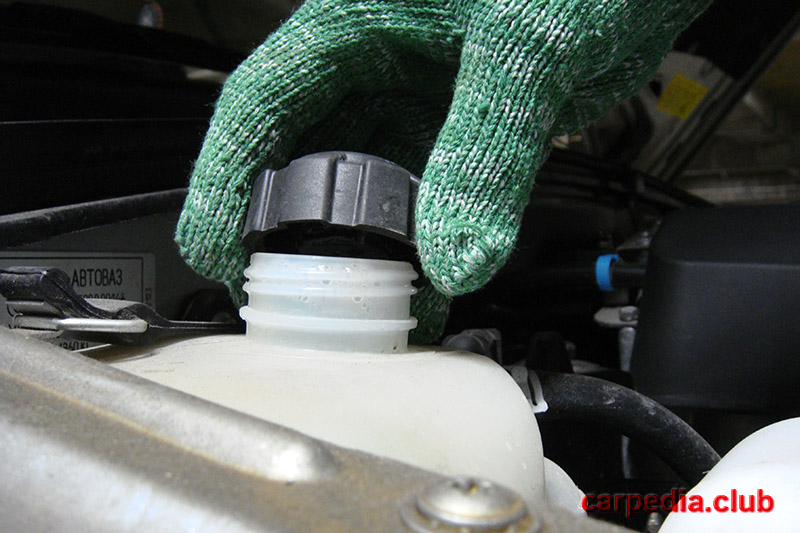
3. Relieve excess pressure in the cooling system by unscrewing the expansion tank cap.
4. Place a wide container with a minimum capacity of 8.5 liters under the drain on the bottom of the left radiator reservoir. To reduce the intensity of draining the liquid at the initial moment, the cap of the expansion tank should be tightened tightly.
5. Unscrew the radiator drain plug by hand and drain the coolant from the radiator into a container provided.
Notes:
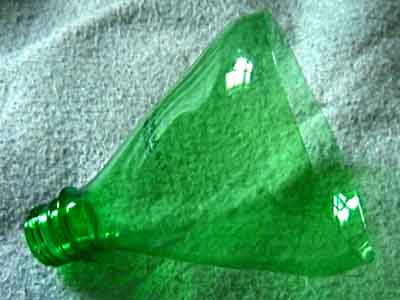
Coolant is toxic and deadly to all living things, so be careful when handling it. To avoid polluting the environment, drain the radiator through a funnel (for example, made from a plastic soda bottle).
The drain plug is sealed with a rubber ring. Replace a torn, cracked or loose ring.
6. Unscrew the cap on the expansion tank.
7. To drain the coolant from the engine cooling jacket, place a container under the drain hole located on the left side of the cylinder block next to the ignition module and unscrew the drain plug with a 13 mm head with an extension.
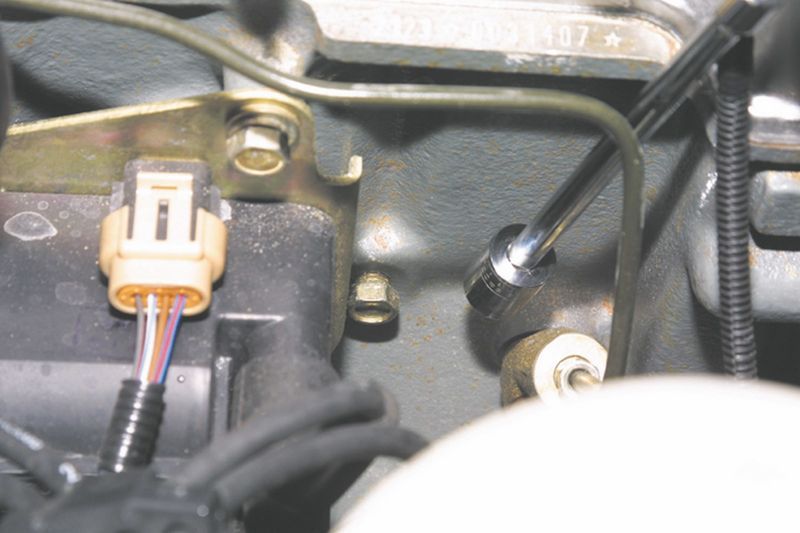
8. A tapered thread is used in the connection between the plug and the cylinder block, which does not require additional sealing. Tighten the radiator and cylinder block drain plugs. Tighten the drain plug of the cylinder block to a torque of 25-30 N ∙ m.
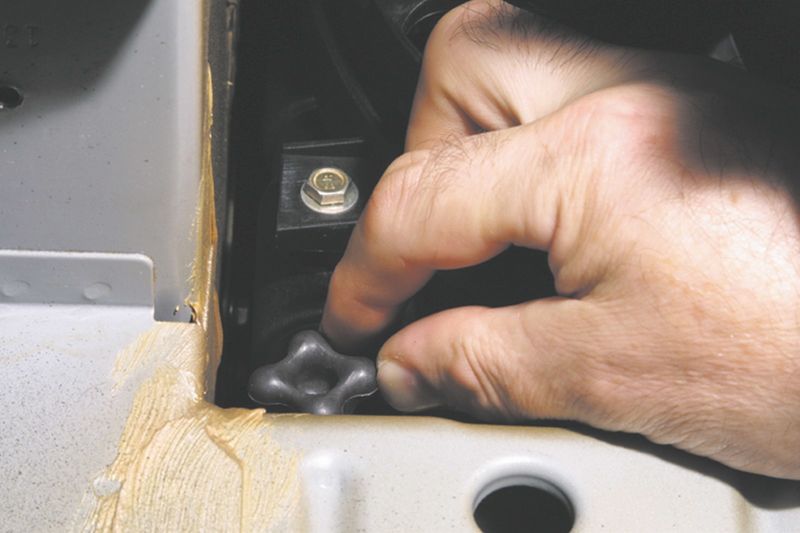
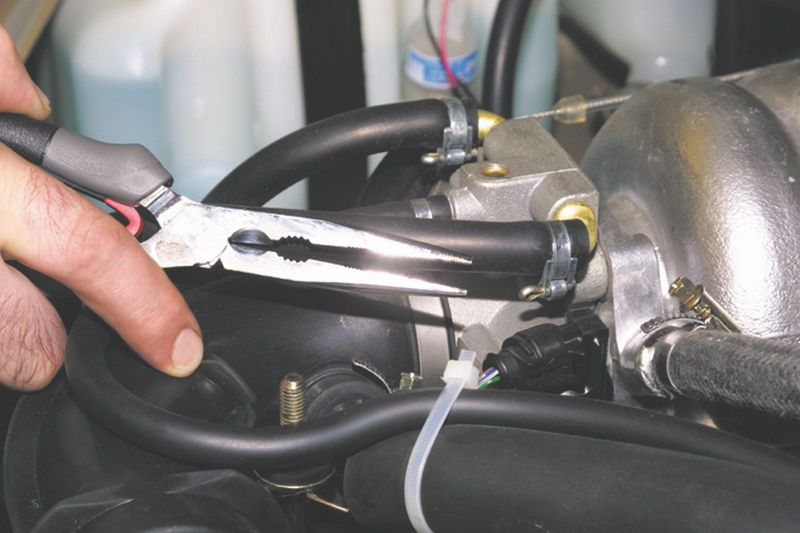
9. Before filling the cooling system with liquid, remove the engine screen (if any), loosen the clamp tightening the coolant supply hose to the throttle assembly with narrow nose pliers and remove the hose from the branch pipe.

10. Pour fluid into the engine cooling system through the expansion tank until fluid flows from the coolant supply hose to the throttle assembly. Then put the hose back in place and secure it with a hose clamp.
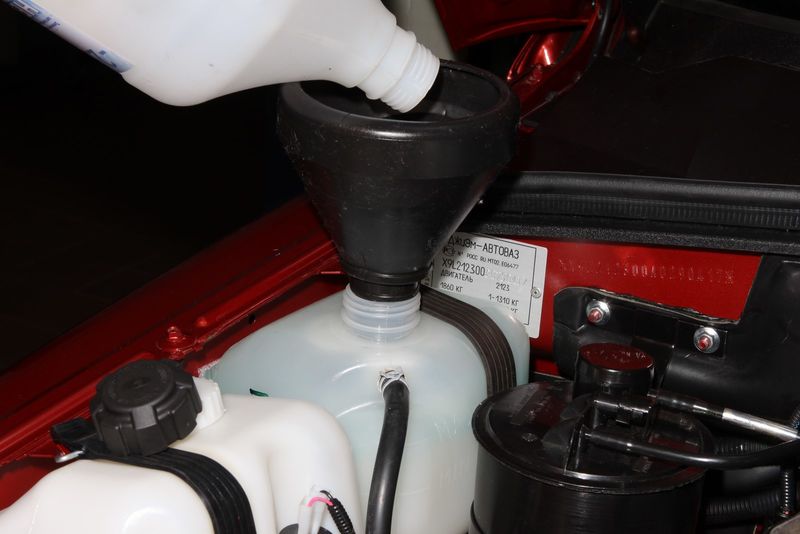
Note:
11. Screw on the cap on the expansion tank.
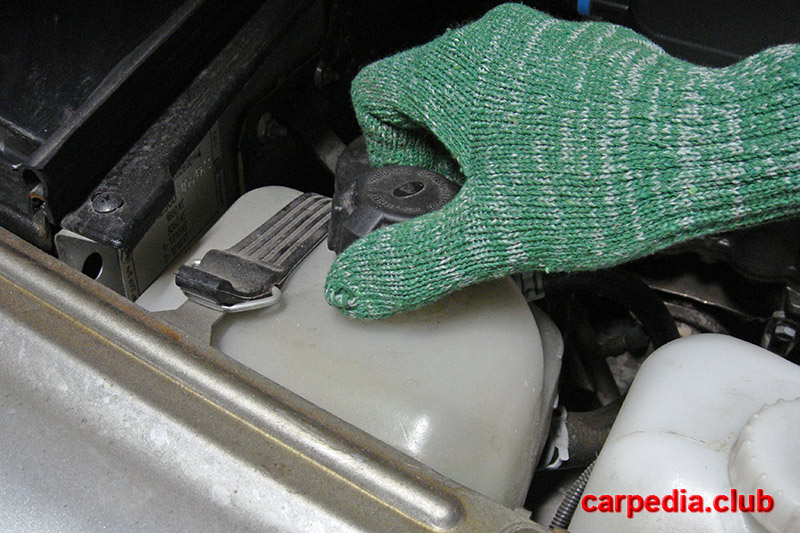
Note:
Tighten the expansion tank cap tightly. The expansion tank is under pressure when the engine is running, and therefore, with a loosely tightened plug, coolant can leak from under it.
12. Start up the engine. When the engine warms up, the outlet (lower) radiator hose should be cold for a while, and then quickly heat up, which will indicate the beginning of fluid circulation in a large circle. Stop the engine after waiting for the cooling fan to turn on.
Note:
When starting the engine, the expansion tank cap must be closed.
With the engine running, observe the coolant temperature on the gauge. If the arrow reaches the red zone, and the fan does not turn on, turn on the heater and check what air is going through it. If the heater supplies heated air, then most likely the fan is faulty, and if it is cold, then an air lock has formed in the engine cooling system. But there should be no plug, since the cooling system was depressurized before pouring the liquid (see item 9).
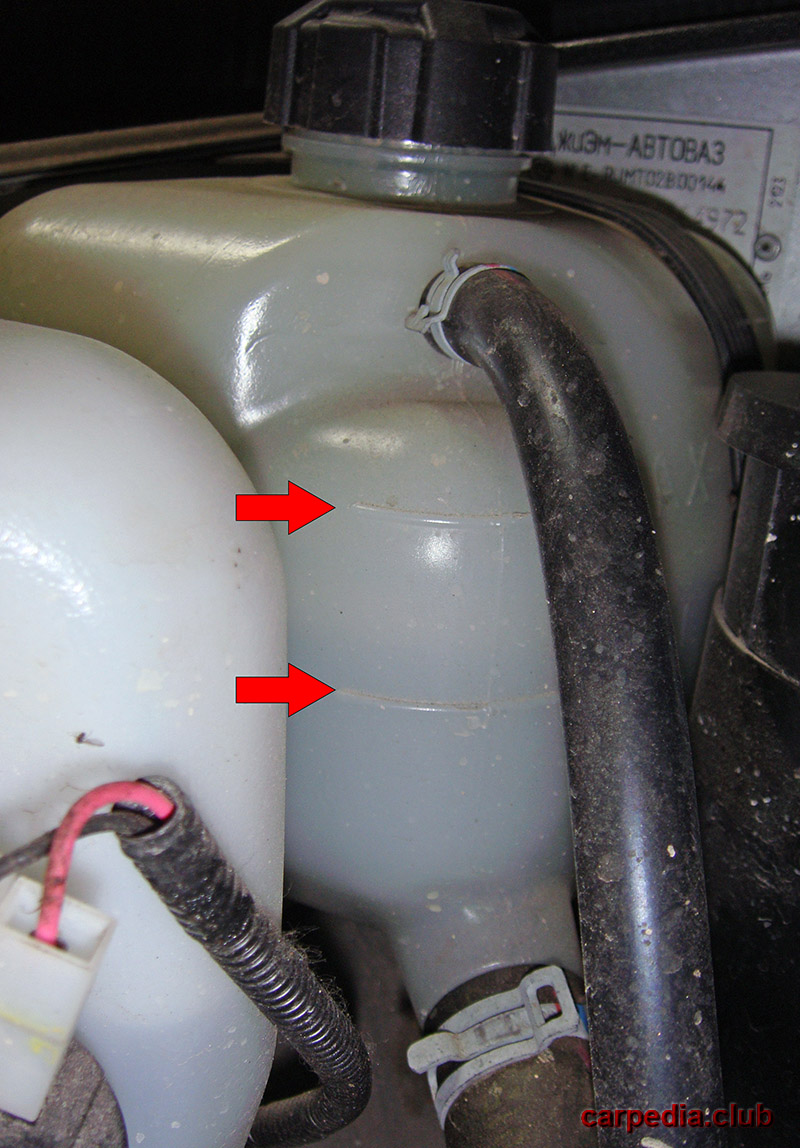
13. After the engine has cooled down, check the coolant level in the reservoir and bring it to normal (it should be between the MIN and MAX marks).
14. After a few days of car operation after changing the coolant, check its level. Add coolant if necessary.
Note:
If, after a very short time, the fresh antifreeze has changed color from blue to brown, then you have poured a fake into which the manufacturers "forgot" to add corrosion inhibitors. In addition, one of the signs of a fake is a sharp complete discoloration of antifreeze. The dye of high-quality antifreeze is very persistent and only darkens over time. Antifreeze tinted with linen blue is discolored. This "antifreeze" must be replaced faster.
The article is missing:
- Photo of the instrument
- Photos of parts and consumables


