We change the pump gur with your own hands
He became an integral part of most cars. Auto engineering of Russian production is no exception. The hydraulicer was initially installed on the VAZ-2110, and after and on all subsequent models. In the hydraulic system system, the weak link is the pump. Unification is positively affected by car maintainability. VAZ models hydraulic switch (ZF brand (ZFLS 7691 955 339) applies to other plant models, as well as on Wolksvagen Passat or Transporter, Audi A6. The cost of it is relatively small and, if necessary, it can be replaced independently. On the replacement of the power steering pump and It will be discussed in this article.
Gira's malfunctions begin to manifest themselves in the form of gravity during the work of the steering wheel, especially on small revolutions, maybe the appearance of a buzz and whistle may appear. With the final breakdown of the device, it stopped helping to steer even in a non-heated state. Since the venerable age of the car did not leave hopes for the official warranty service, I decided that the replacement of the steering power steering will be made on its own.
Rating in advance, I note that the independent replacement of details, in order to save money on repair, showed an excessive optimism of such an idea. Work on his replacement was quite time consuming. However, for those who work with a car is a kind of rest, the repair of the hydraulic line will not seem something special.
Before starting work, it is worth estimating the general condition of all Gur nodes to make their replace if necessary.
It is worth assessing the need to buy a pump, pulley, glad, Teflon rings for high pressure and belt tubes. Start your work, removing the protection, the mudguard on the belts. Next, tanks are filmed. Gur belt removes either just cut it, depending on its condition. Next, the disconnection of the hydraulic tubes should be disconnected, both undermining so and the discharge, fastening on the nuts. 
On the right side of the radiator, we take out the gland feeding the tube, which is kept by a simple lock, after which we drain the liquid from the tube. To completely remove the fluid from the system, it is desirable to ask anyone to twist the wheels of the car. After this operation, I disconnect the flange of the High Pressure Tube. The next step is unscrewed the clamp, which fastening the feed tube. The fastening of the pump is held by four bolts. Three of them are unscrewed immediately, and access to the fourth opens after the bolt of the timing belt bolts. Now you can delete all four bolts fixing the pump.
How to change the pump
Disassembling the pump and disassembly of the gur must be performed according to the instructions. Next, I recommend cleaning it from dirt and inspecting in order to identify the causes of the malfunction. Often the cause of breakage is the production in the inner cavity of the pump housing. Visually, it is perceived as a step. You can cope with a defect with a drill with a nozzle. However, difficulties may occur if there was not a collapsible model of the pump, which does not have a locking rings or covers. 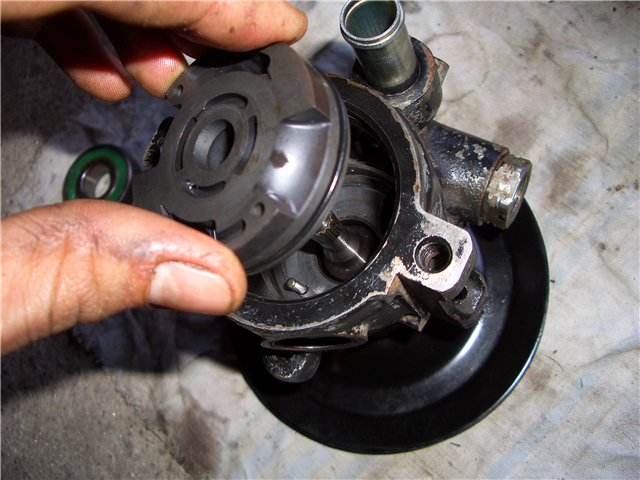
I broke the hose mounting knobs to the tank, because in my case the clamps turned out to be disposable. After that, I merged the remnants of the liquid from the tank. With secondary use, it is necessary to look inside and check the cleanliness of the grid there. If necessary, the tank should be rinsed or buy new, since the cost of its low. This is not completed on this system. All internalities are desirable to clear the air atmosphere with compressed air under pressure. After that, the clamp of the pump nozzle is disconnected.
Teflon gaskets are durable, however, on the flanges of high pressure tubes, they should be replaced with new ones. Even in a comfortable environment - a garage, a pit - I have replaced the pump from about three hours of work. In general, work on the replacement of the pump takes about six hours of neat work. If the pump design allows you to repair it, then the pulley and the gland also occupies a special place. 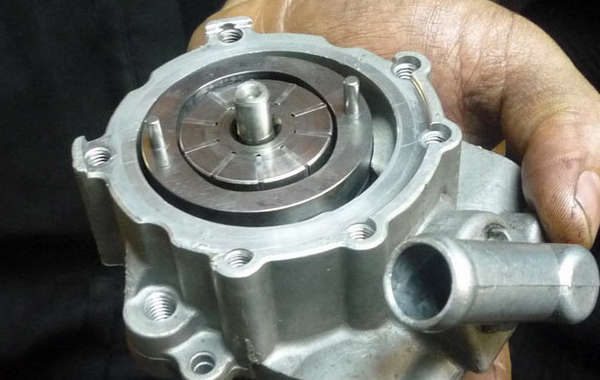 But in order to save time and efforts, it is better to replace it with a new one. If the replacement is impossible, you will have to press the new pulley on the new pump shaft. Construction with nut with nut. The pump shaft has inside the M6 \u200b\u200bthread. To put on the flange on the shaft, it must be preheated. After cooling, it snags on the shaft. Inside the pump, the guro bearing is fixed by a bent edge.
Installation of the gur is carried out in reverse order. I carried out the belt stretch with the help of a cone. Sometimes for these purposes a special tin device is used. Either another option is possible when the guro fastening is not fully delayed and the belt is free on the pulley. Only after that, the entire design is fixed with the required degree of belt stretch.
Pump pump after installation
Collecting pump gur in reverse order. After the assembly, the GUR can make a buzz, but this should not be frightened, because the parts will be pronounced after 300-500 mileage kilometers. Some machine owners retain, but I would recommend pouring a new liquid. 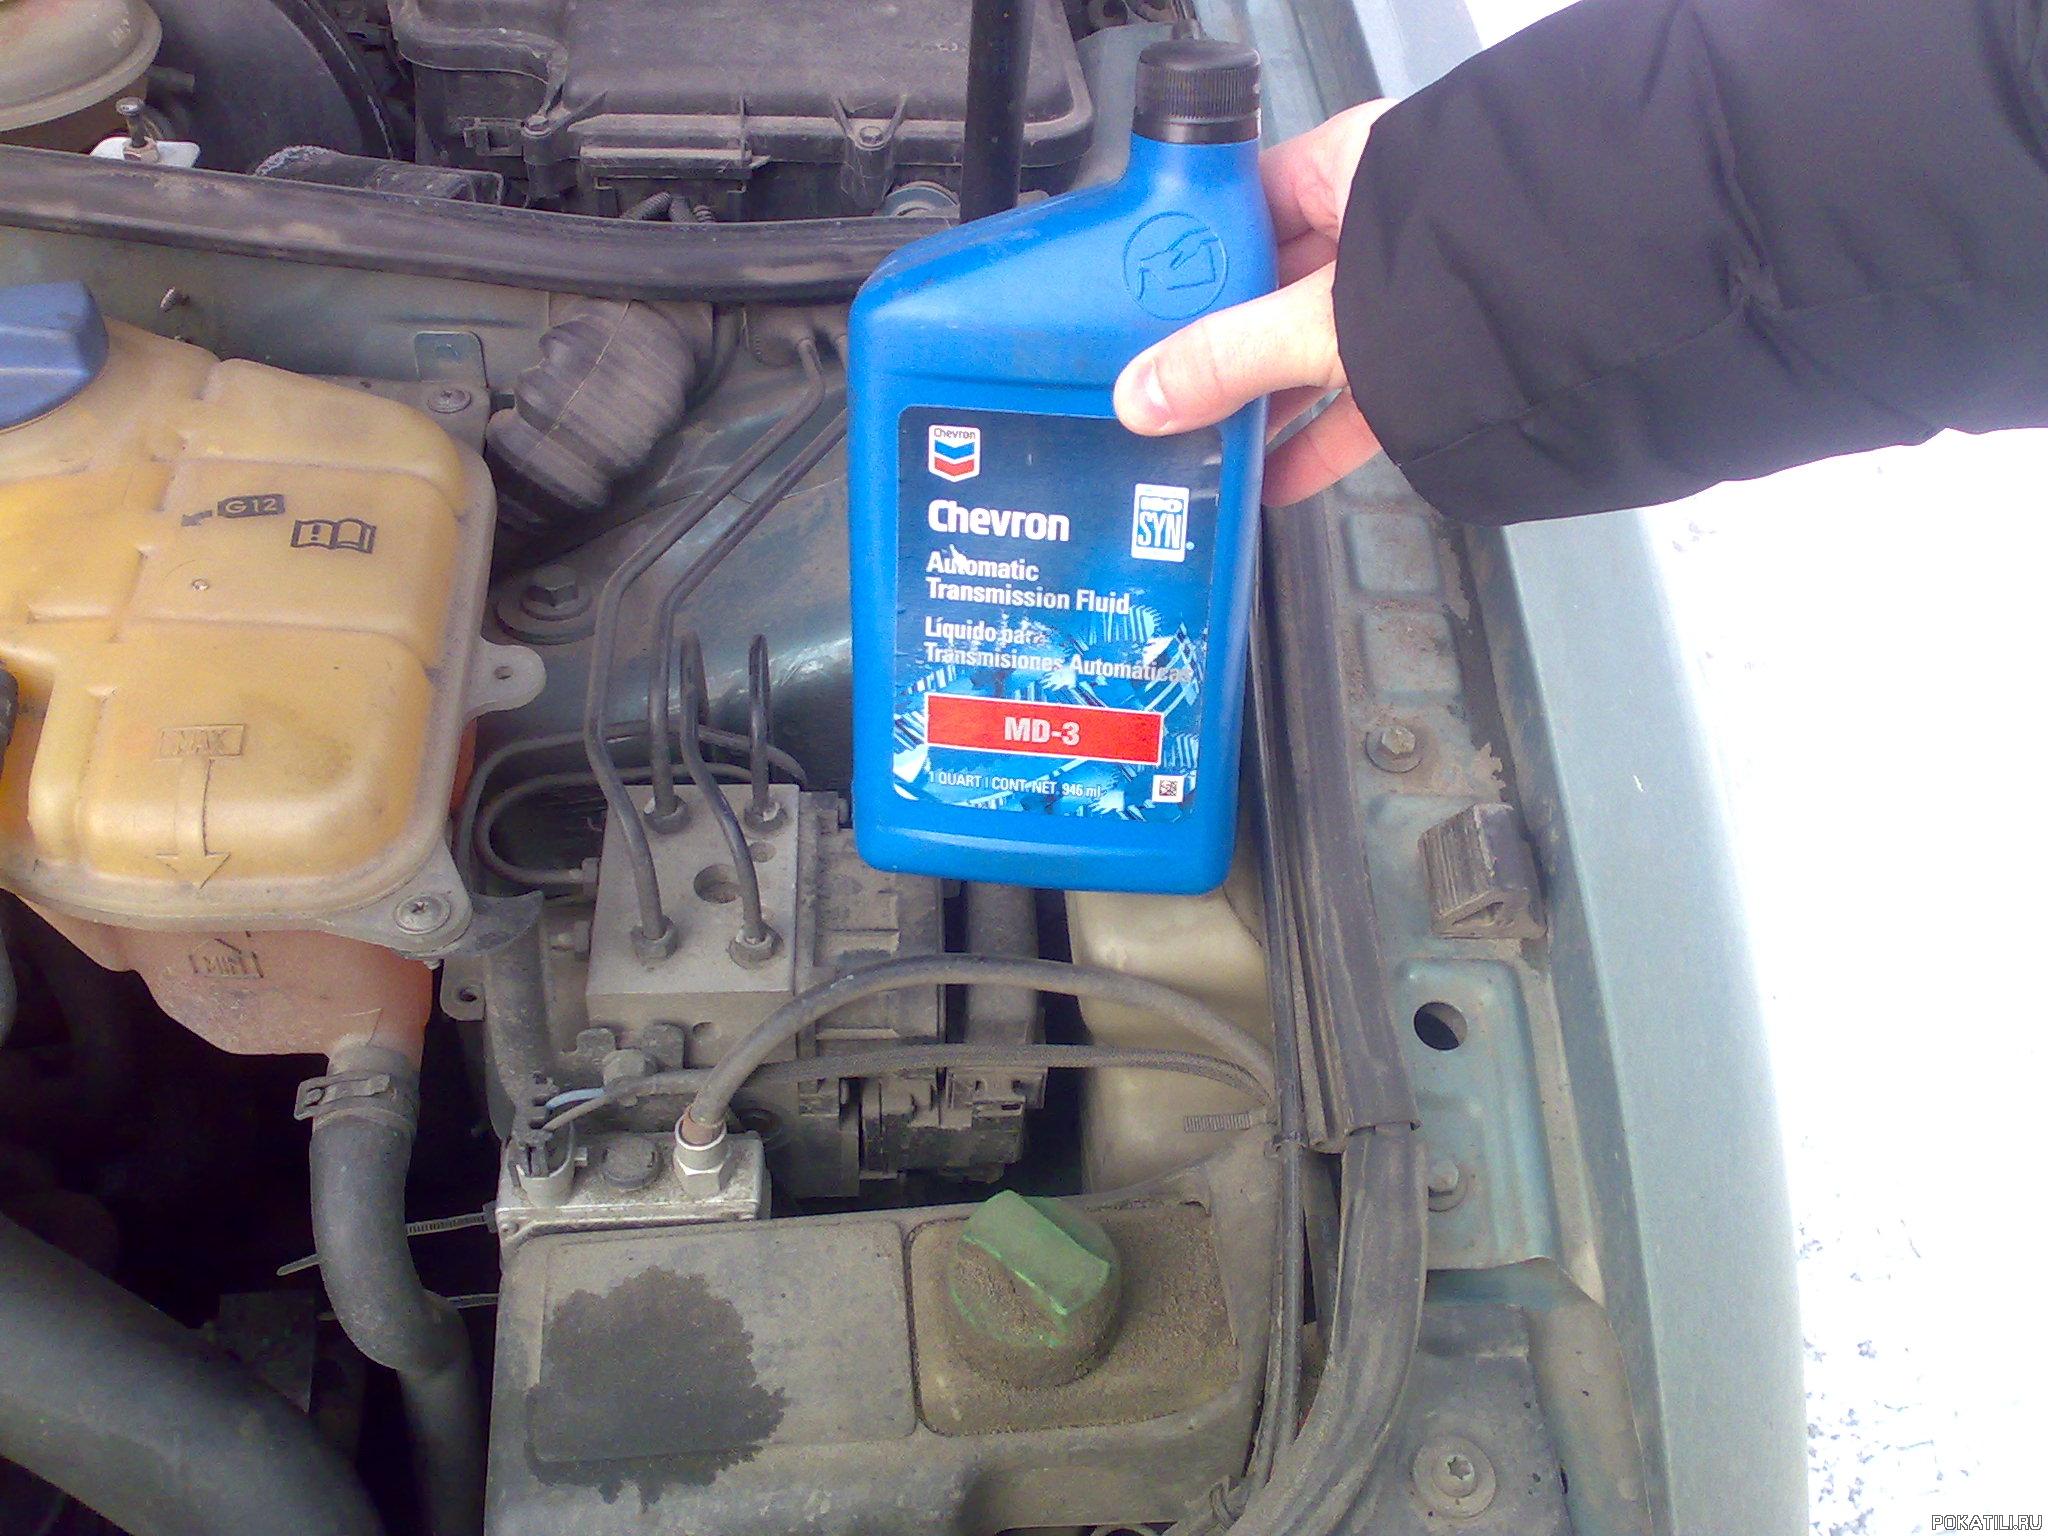 It is usually poured until the tank is completely filling. Filling the system is performed when the engine is running. It is important to prevent air from entering the system. If this could not be avoided, as it happened to me, then after foaming the fluid, thirty stood with an open tank constantly pouring it into GUR. And even after that, during two hours, GUR was twitching.
Video "Replacing pump GUR at home"
In the video below, you will learn how to replace the pump GUR at home.


