Toning car windows with your hands
Toning of car windows, no doubt, is an important element of external tuning. Tinging your car or not - the case of the choice of every motorist. In this article we will tell you in detail how it should be properly toning the car film with a film with their own hands. And at the end, you can watch the learning video.
Toning is a process requiring accuracy and preliminary preparation. But with a certain skill, the tinting of the car can be performed independently.
Below we have prepared a step-by-step instruction for tinting car windows: from the selection of the toning film before sticking the reflective strip on the windshield.
Choosing a film for toning car windows
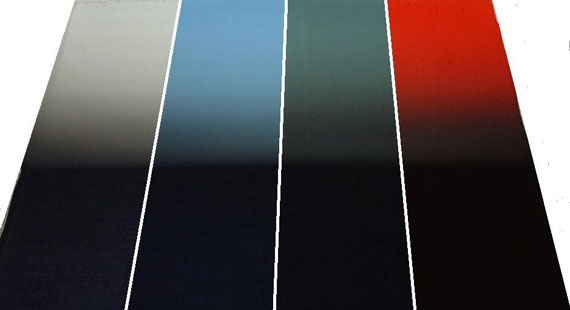
The tint film market is so great that for its review, we wrote a separate article about films for tinting braid cars. In short, then we advise you not to buy cheap Chinese sets of type "Make yourself", but to purchase only a high-quality rolled film for tinting glass.
Nevertheless, it is better to see once than hear a hundred times. Therefore, we suggest you watch a video lesson on tinting car windows with your own hands, which is located at the bottom of this article.
And for better assaying material, all stages of self-tinting glass are described below and can be used as a crib.
Materials and tools for tinting car windows
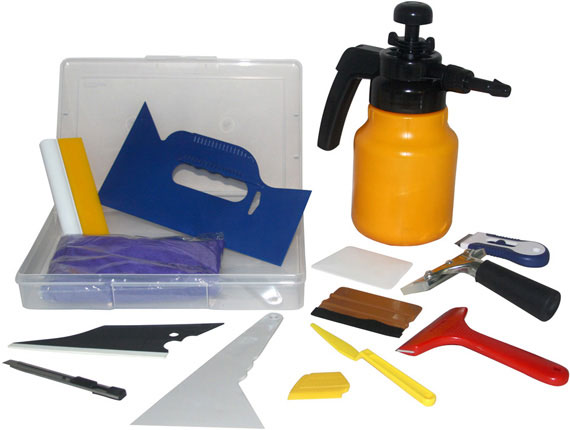
In the process of self-tinting windows of the car you will need the following tools:
- spray,
- soft and hard surveillance,
- paper napkins,
- sponge,
- scraper,
- line
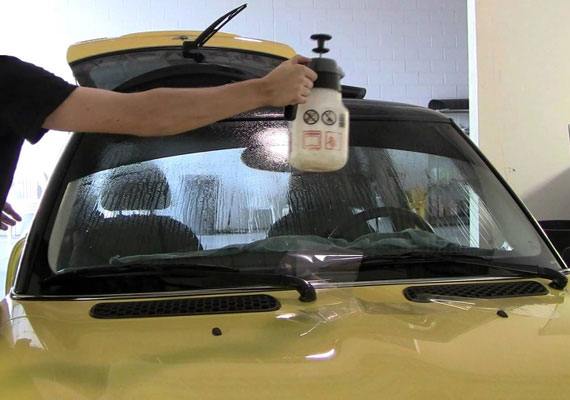
To work with a toning film, a water-soap solution is used, prepared in such a proportion: by 1.5 liters of water 5 drops of washing shampoo. Mix the solution thoroughly (for this you can use the container of your sprayer).
Before starting toning, it is necessary to make a thorough outer cleaning of glasses with a cooked water-soap solution.
Pattern of the film for tinting side windows of a car

Before starting toning car windows, you must perform the pattern of the tint film. To do this, it is necessary to determine where it has an adhesive layer - it is protected by a transparent liner. Always exprobe the film along the roll and make sure that the cut piece is a few centimeters more than the glass. Moisten the glass outside and place a pre-sliced \u200b\u200bpiece of toning material by the liner on it.
The lower part of the film should be parallel to the outer horizontal window seal and enter it approximately one centimeter. With the help of pastures and a knife, do side vertical slots in the film with such a calculation so that after that it was possible to throw the pattern to the vertical seal for about one centimeter. Next, fading the bottom of the pattern, lower the glass slightly and, fixing the film on the top edge of the glass, make horizontal slot in it, and then give it the final form.
The billet for tinting the deaf glasses is exhibited so that it is a few millimeters more than the transparent glass area.
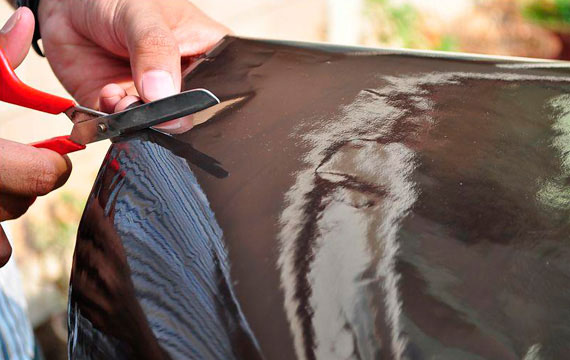
Pre-lock the film outside on the wet surface of the glass. Pull the workpiece carefully and not in a hurry. If the transparent area is limited to the seal, then cutting along the seal should apply an intact. Be careful not to spoil the car exterior details with a knife!
Extra pieces of patterns for convenience, try to delete immediately after the cut. If the transparent area is limited to an opaque paint strip, then it should be sweding so that it goes to a few millimeters to the opaque part. Make sure that the blade of the knife is always sharp (laid out the blurred parts of the blade in a timely manner).
Pattern of the film for toning the rear window of the car
The outer surface of the glass and tinting film must be absolutely dry. The letter "H" is drawn on the surface of the glass with a wet sponge, and the toning film is rolled along the roll of the adhesive layer outward. Our workpiece should be greater than a transparent glass area.
The remaining tinting material together with the roll must be carefully removed. To do this, it is better to resort to the services of the assistant. Place the workpiece outside on the rear window so that there are no horizontal folds, but only vertical. Close the film with the letter "H", as the glass has a spherical surface.
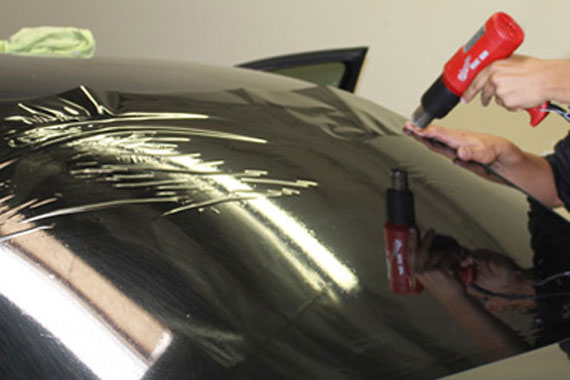
The folds on the tint film must be smoothed using a hair dryer. Be careful - do not overheat it, while you can warm only vertical folds! After removing all the folds, moisten the surface of the glass and the film, and gently scroll the pattern. As a result, it should take the shape of a glass without folds.
Close the workpiece from the center of the glass to its edges, both in the vertical and horizontal direction. Gently do this operation, using pasture. Make sure that the film in the process of tinting is not climbed, and evenly smoothed over the surface of the glass.
The next stage is the exact trimming of the film to toning the car's glass. It is recommended to use a spotlight to illuminate from the cabin. The cut line should enter the opaque area of \u200b\u200bthe glass for several millimeters ().
Application of film for tinting on the side windows of the car

Moisten the surface of the side glass and with the help of the staple, clean its lower part. Then lower the glass into several centimeters, moisten and also clean the rest of the surface using the fastener. Clean the blade surface sequentially and make sure that there are no crude areas. Next, wash the glass with a rigid sponge and wipe dry with a rubber distortion. Glass edges wipe with a napkin. Dimel again and wipe the glass with rubber trampling.
Before applying a film for toning, beyond the glass. Then, with a blank, it is necessary to remove the liner protecting the adhesive layer for two thirds, and moisten the adhesive surface. It is convenient to carry out this operation on the rear window of the car, putting the pattern with adhesive layer outward. Excess the liner removed from the workpiece, it is better to cut before applying a toning film.
Moisten fingers. The fingertips must be clean, as in the process of tin tinting, it will be necessary to touch the glue layer of the film!
Gently take the workpiece and put it on the prepared glass surface. Try so that the adhesive layer concerned only the surface of the glass and did not touch the seals and other surfaces.
Align the film for tinting over the top edge. Make sure that there are no gaps and lumen anywhere, and begin to gently squeeze the solution from under it.
Hold the pattern with your hand, since with the initial extrusion of the fluid, the blank will slide on the glass. Squeeze water from the center to the edges. Use rubber and then hard distortion. Rigid outcrop drive fluid in the same directions - from the middle to the edges. Then, with the help of trampling and hair dryer, lock the film at the top edge of the glass. After that, with a knife, remove the surplus of the toning film, protruding on the upper edge of the glass - this technology allows not to leave the gaps along the top edge.
Raise the glass. Bend the lower part of the pattern by the liner protected and dust with a glass with a solution. Fully remove the liner. Do it extremely carefully and make sure that the film without a liner does not touch without a liner with its adhesive layer. Carefully fill the toning film under the glass seal. Press the horizontal internal seal by distillation and, refueling the toning film, make sure that it is not climbed - this operation also requires certain skills, so be particularly attentive (pay attention to how this operation will hold a master in a video lesson).
Singing a solution from under the film using a hard distortion. Squeeze the water with sequential movements from top to bottom and from the middle to the edges. Finally remove moisture remnants using pastures wrapped in a napkin and a hair dryer. Ensure that under the film in the process of toning there is no water bubbles.
Technology cleaning and stickers of small deaf glasses will be identical.
Application of a film for toning to the rear window of the car
The process of cleaning the rear window of the car is somewhat different, as it has a heating thread and it is necessary to exhibit extreme caution so as not to damage them. Instead of a scraper, it is recommended to use a plastic blade. Then the glass need to be washed with a rigid sponge, wipe it dry with hard distortion and wipe the cloth around the perimeter.
Before applying the film for toning, weanly moisten with a solution with a solution, while covering the rear shelf with a rare or some other manufacturer so as not to pour the car electrical equipment. To glue the toning film on the rear window it is better to resort to the services of the assistant. Removing the liner, immediately wet the withdrawal with an adhesive layer with a water-soap solution.
Gently, without touching the adhesive layer of foreign objects, bring the workpiece on the glass - this is a very responsible operation and requires a certain skill. Try to make the film not twisted, did not climb and did not bended. The adhesive layer of the pattern should concern only the treated surface of the glass and, in no case, neither parts of the interior of the car, nor the clothing of the installer.
Align the pattern on the glass in such a way that there are no lumen, and begin to smooth it up using a rubber distillation. While tinting the glass, smooth the film from the center to the edges, so that there are no air and water bubbles under it. In hard-to-reach places, use a plastic blade.
Next, moisten the toning film and squeeze the residues of the solution from the rigid distillation from it. Squeeze along the heating threads - from the center to the edges. Then this operation is then tight outcast, but already wrapped in a napkin.
The final stage is to press the toning film along the perimeter of the intake, while at the same time heating the glass from the outdoor side using a hair dryer. Be careful not to overheat the glass!
Sticking a reflective strip on the windshield
The toning strip must be cut along the roll with a small margin. Moisten the surface of the glass and place your glue layer outward on it. Make slots along the seals, and remove the excess films for toning. Remember that only special blades should be used, not leaving scratches on the glass!
Schedule the pattern so that there are no horizontal folds - only vertical. Then, with a hair dryer and distillation, heat and scroll vertical folds. Be careful, the windshield is afraid of temperature drops, so do not dramatically heat and do not cool it - it can burst!
Moisten the workpiece, fold it in half and neatly smooth so that there is no wrinkle. Then, using a ruler and a knife, make a seat at a distance of 10-12 centimeters from the top edge of the pattern.
Do serfs as often as possible. With this method, you can make a reflective strip of any width. Width will depend on what distance from the edge you will make serifs.
After that, remove the excess tint film. Then decompose the pattern for the entire length and with the help of the ruler, shift serifs with each other (this process is clearly shown in the learning video below). Always when working with a film in the process of tinting the glasses, put it with a glue layer and a liner on yourself.
After that, placing the resulting workpiece on the damp windshield outside. Dimel and scroll the pattern, and with the help of backlight from the inside, perform accurate trimming. In order not to be lumen after the tint film stickers, make the breakage in such a way that the film goes to the opaque glass area into several millimeters.
Cleaning glass, and applying a film for toning from the inside, follow the same way as in previous cases.


